Pages

Tuesday, 10 July 2012

How to Make an Easy Peasy Envelope Cushion Cover

One of the many wonderful things about living in East London is the range of markets. Ridley Road Market in Dalston is a brilliant place to find lots of unusual and relatively cheap fabrics and has loads of great African tribal prints, which also happen to be bang on trend at the moment.

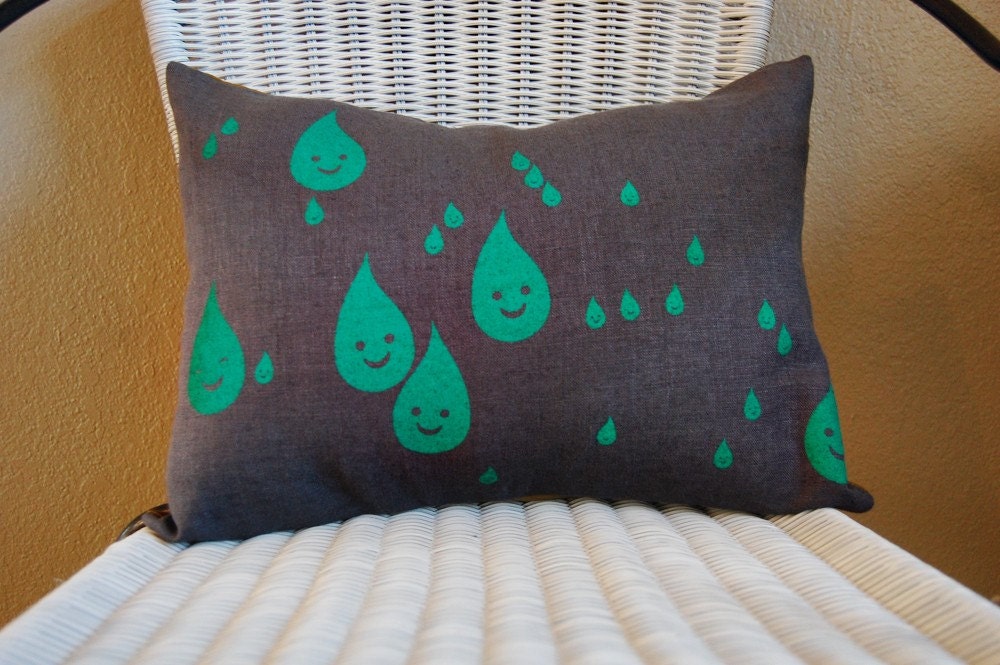
My friend Amber asked me to make a cushion for her, so I thought I'd take the opportunity to share a tutorial as it really is very easy. It's perfect for beginners and can also be sewn by hand if you don't have a machine.

You will need:

  • Cushion filler - I used one that is 44cm x 44cm (you can buy these new or upcycle an old one)
  • About 1 metre of material - I used 1.05m of material with a 0.5m width  (the amount will depend on the size of your cushion filler)
  • Measuring tape
  • Pins & chalk 
  • Fabric scissors
  • Cotton thread
  • Sewing machine (or needles if sewing by hand)

1. Measure your cushion filler, the one I used was 44cm  x 44cm.

2. Now for your fabric; if it's wide enough you can cut out one big piece so that you have less sewing! Add on a few centremetres as a seam allowance - I've added 2 cm. Measure out your material, mark the length you require with chalk on the wrong side of the fabric and cut it out - the fabric I used was 46cm wide and 105cm long. 


As you will see in the diagram below the two sections that you will fold over to form the envelope need to total more than the length of your cushion filler so that the material overlaps. 


(If you are working out your own measurements, you don't need to worry about being too exact but a good guide is to take the length of your cushion filler then add on about a 1/4 of that length again then divide that total between the two sides of the envelope. Don't divide it equally but make one side longer than the other as this will look neater.)

3. Iron your material so that it is all flat 

4. Fold over the ends by 1 cm each end, pin into place and then hem them on the machine (or by hand).


5. Lay the material right side up and put the cushion filler in the middle. Fold over the ends so that they overlap. Make sure it is quite tight around the cushion so that it isn't all saggy when it is finished. Use pins to mark where the folds are on the material.


6. Take the cushion filler out and then pin all around the edges.

7. Sew up the two sides and cut away any excess if necessary.


8. Turn the pillow the right way out and insert the cushion filler. And you're done.


9. Place on a chair and put the kettle on : )


Tuesday, 22 May 2012

Stars and Buttons Go Screen Printing

The Boy in action
Ever since Stars and Buttons started, I've wanted to create unique and special designs that make my stuff stand out. Drawing is not my strong point but luckily my other half trained as an Animator and spent some time working as a Storyboard Artist. He's got a great quirky style and is always doodling so I've been trying to get him involved and turn his promises of help into some actual final designs that I can use.


The Boy's dog design


Finding the time with busy day jobs has been a challenge, so I decided to enrol us both in a screen printing course to inspire us. Last week, we both fought hard to leave our office jobs a bit early to race over to Islington and spend the evening at the wonderful Make Lounge


This is my third craft course at The Make Lounge and I can't recommend it enough. The classes are always friendly and well organised. After only a few hours (and a few glasses of wine) you leave with not only some completed projects but a life skill that you get to keep forever.


My fruit tea towels
I kept my designs super simple and tried to focus on learning all about the paper stencil technique. The teacher Helen Rawlinson, who is an acclaimed lighting and textile designer, was a brilliant teacher. She shared lots of top tips and kept us focused throughout the session. It was great fun and soon memories of messy afternoons screen printing at school came flooding back. I forgot how satisfying squeegees can be! I printed some fruit shapes on tea towels and created a couple of special Stars and Buttons tote bags to use at my sewing workshops this summer. (Pictures to follow once I've added some finishing touches.)


The Boy created some much better designs, including a dog and wiggly worm and flower combo, which he printed on a couple of tea towels along with some T-shirts that came out really well. (He's a perfectionist so insists these are not the 'final' designs!)

The Boy's worm & flower (and yes we're trying not to mention that it looks a bit phallic!)
I think it's safe to say we both now have the screen printing bug and are trying to find a space we can hire for short printing sessions in London.


Next stop is our own designed, printed and hand made products. Exciting times!


Visit The Make Lounge website for more information about their classes.

Find out more about Helen Rawlinson by checking out her blog.

Wednesday, 25 April 2012

April Showers

All this rain could get a girl down. But instead I'm looking on the bright side by celebrating cheerful brollies, shiny wellies and chubby raindrops.

Umbrella Garland by GFetti


Puddle Print by Belle and Boo


Pillow by DesignKitty


(You can see my full April Showers treasury list on Etsy.)

Tuesday, 17 April 2012

Workshop Planning

Something great happened this week. A friend of mine asked me to run a crafting workshop at her sister's hen party this summer which I'm very excited about. Having organised a lot of hen dos myself, I know that the pressure is on to make it a fun and memorable day. Not to mention perfect (eek should I panic now?). I immediately thought of loads of crafting projects but it turns out beginners are afraid of sewing machines. So now I'm coming up with some options for an easy but useful item that they can sew by hand.

As I now make most things on my machine, it's been a good reminder of how much fun hand sewing can be. And with Spring trying to elbow it's way in past those pesky April showers, hopefully it will mean I can makes some things and enjoy the sunshine at the same time - will keep you posted on the planning progress!

Spring blossoms in London Fields

Sunday, 5 February 2012

I Heart You

I knew that making a New Year's resolution to sew more would be pointless, at least until the day job calms down. However, I am determined to craft something for Valentine's Day rather than pay over-inflated prices for something "romantic" but tacky.

As ever Etsy is a great place for inspiration, so I thought I'd share some heart-themed ideas from my treasury list.

I love the simplicity of this handmade card by RainyDayColors:

  (Photo via http://etsy.me/xAJ7VC)

These Lego heart necklaces from Luv4Sams are also simple but sweet:

(Photo via http://etsy.me/yE0i3I)


And these hand-carved heart stamps from MemiTheRainbow look like loads of fun:

 (Photo via http://etsy.me/Ab3QEo)
You can see more heart-themed gifts for Valentine's Day and beyond at my Etsy treasury list.

Sunday, 13 November 2011

Sunday Skirts

As this isn't the first time I've mentioned Christmas on here, you won't be surprised to know that I've already started on the mulled wine. I figure I'm allowed as I'm making Christmas presents, with the added bonus that if they turn out well I'll develop some more lines to sell in my shop.


I haven't quite gone as far as playing the Christmas tunes yet (the boyfriend draws a line when it's still this early), but I was pretty pleased with this cute little skirt. Next I'm planning a range of different fabric and sizes (this one should fit a 2 year old). I'm thinking of making one for my goddaughter in a Liberty print and I'm already regretting not buying some of their adorable Hello Kitty fabric. It seems to have sold out online but hopefully it wasn't just a one off collaboration.


(Photo via: http://www.liberty.co.uk)

Tuesday, 11 October 2011

Renegade Craft Fair Comes To London


This weekend, the successful US based Renegrade Craft Fair came to London for the first time. It was great to see so many crafters that I follow online and to discover new talents as well.

Of course, I might be biased but I thought my friends Robin and Mould had one of the best stalls and their new fox prints were certainly proving popular. I managed to buy some early Christmas presents from them - although I’m already thinking about keeping one of the fox cushions for myself! 

Photo from www.one-ofakind.co.uk

I also bought a sweet tea towel from the lovely One of a Kind which sells beautiful textiles designed by Kate Rawlinson. Her stuff features lots of trees - which I love!

I took a break from stocking up on loads of hand-designed cards by stopping off at the Honksville stall run by British artists Katherine and Rebecca. I fell in love with this brilliant beard-lovers badge and had a go on the tombola on their stall. Although I didn't win anything, I think the tombola and lucky dip they'd put together were a great idea. It reminded me how important it is for vendors to have some affordable options so people can have fun and still take a piece of someone’s artwork home, even of their budget doesn’t stretch to a print or cushion. All notes I’m filing away for when I get around to having my own stall at a fair!

Photo from www.honksville.com
I also managed to grab handfuls of business cards for some online shopping and I’ve booked out my diary for the Got Craft holiday fair on 27th November at the Tooting Tram and Social. It's another craft fair with connections across the pond, it looks ace and anything with a Christmas theme is always a winner with me - see you there!